
Between the time I wrote the first post and this one, the Panjshir Valley fell to the Taliban. Amhad Massoud, however, is still apparently alive and in Afghanistan and still vows to fight the Taliban. Both sides accuse the other of spreading falsehoods. I suppose war in Afghanistan must continue as ever.
I also, since that first post, tried the other two scenarios which take place on that same day, i.e. May 15th of 1982. Like all the scenarios in this five-part series, these are battles from the diversionary attack along the Ghorband River Valley. If you read through the scenario text of the missions, it is clear that this whole Panjshir Valley series is intended to be played from the Soviet side. So I gave that a try.
To put Massoud off his guard, the plans for an attack along the Ghorband had been shared with the Afghan Army. Soviet Command knew that there were sympathizers within that force that would pass the details along to Massoud’s people. Meanwhile, the real attack was planned in complete secrecy and was set to launch the next night, on May 16th. To be a convincing diversion, the Ghorband operation had to be large enough and aggressive enough to look like the real thing. Nevertheless, its purpose was not to succeed, it was to distract. I don’t have any information on the outcome although I would think I’d have found some mention if it had turned out a disaster for the Soviets. I’ll come back to this.
Soviet-Afghan Wars was the 8th of the Squad Battles series to be released (2007, I think). That obviously has implications to the engine (and I talked about how it was relatively bug free) but it also impacts scenario design. I’ve complained (and sometimes, it seems, that is all I do) about how Vietnam and Tour of Duty suffer scenario design problems, alternating between being impossibly hard and ridiculously easy. As usual, I offer the disclaimer that the first may be due to my own inability to play this game and the latter comes from scenarios intended to be played against another human. Whatever the details, it is probably a fair assumption that this set of battles is better optimized for the game engine than the earlier products.
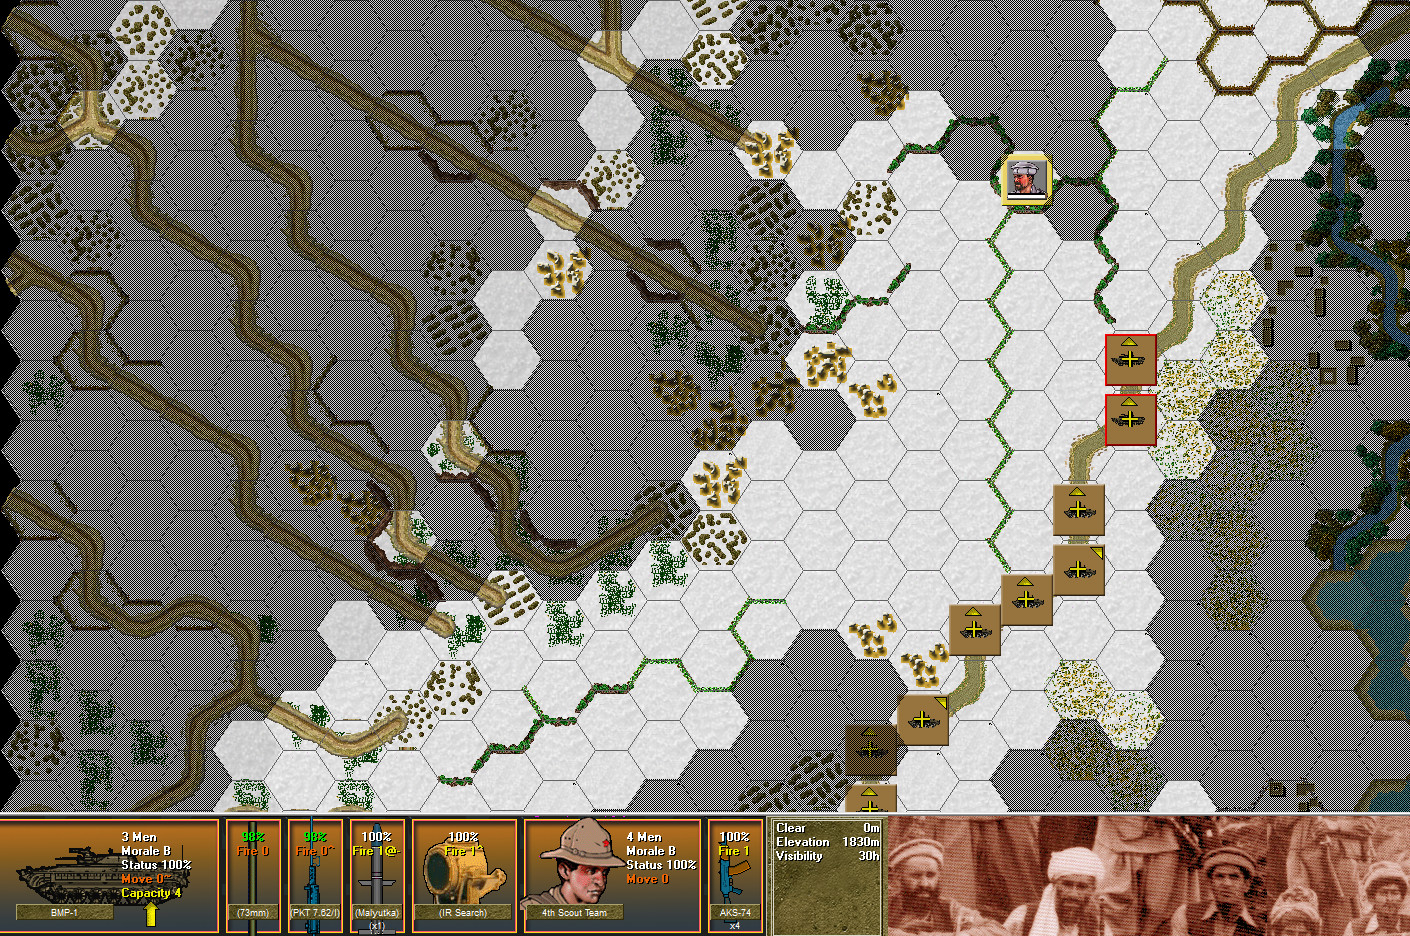
The first of the two remaining scenarios is a typical ambush setup, very much like the one I just played in Tour of Duty. As I move my force up the road, I discover hidden enemy positions set to thwart my path (first revelation is shown above). Winning the scenario involves exiting forces off the far end of the map but you’re never* going to run the gauntlet without engaging the enemy.
I’ve opined that sometimes these “convoy” type scenarios, particularly when Tiller himself designed them, were meant to set the mood for a “part 2.” In other cases, an ambush may be meant to illustrate the historical situation without necessarily providing a “competitive” gaming experience. As I say, it may be that I’m just too boneheaded to know how to deal with this kind of attack but, as I’ve mentioned before, an RPG-7-armed unit suddenly being revealed two hexes away guarantees that you’ll lose at least one vehicle. Conversely, actually rooting out the ambushing position is a long and frustrating process.
But given that this is #2 in a scenario set, and only six turns at that, it may very well be an appetizer for the main course that is scenario #3, titled 108th-3 Storming the Castle.
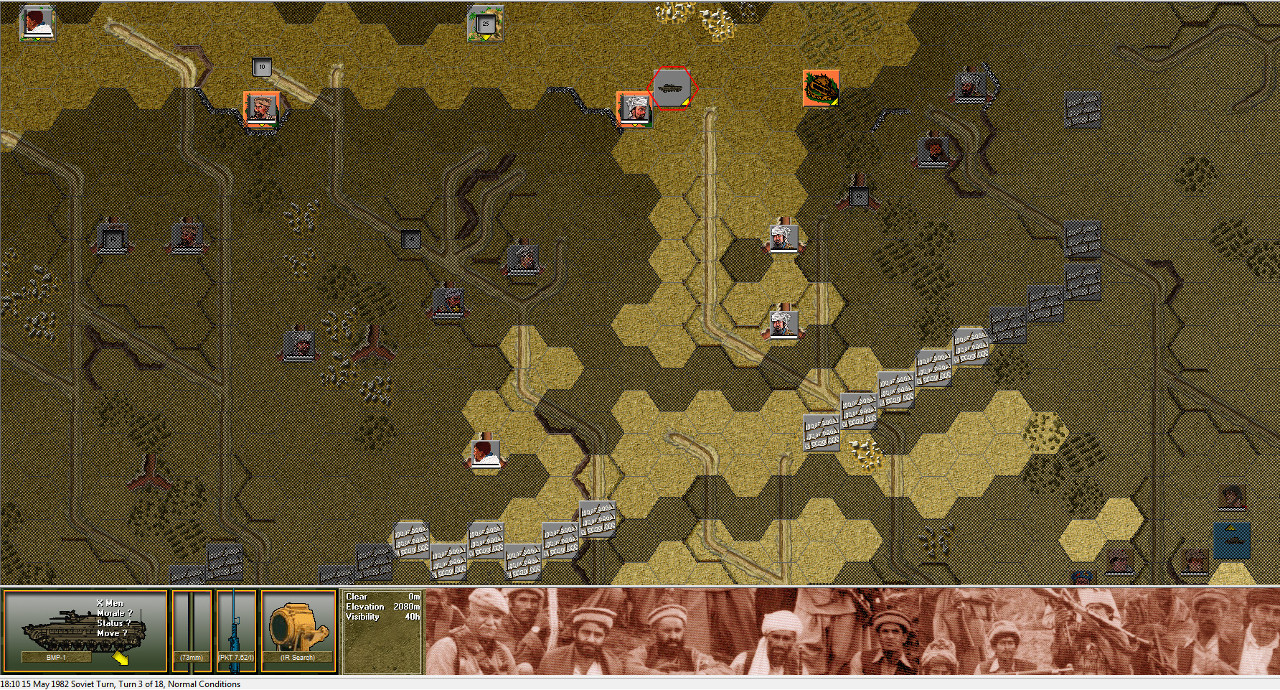
This is another familiar type for someone who has been playing a lot of Squad Battles: Tour of Duty. The Soviet force has to take a well-fortified hilltop position and has a substantial attacking force with which to do so. It has much going for it. It is a big scenario (lots of map space) that involves a wide variety of combined arms. Infantry, armor, special forces, artillery, air, and helicopter support all are available to try to climb the hill.
One of my “moments” while playing this was finding the enemy using armor (see above) and heavy artillery against me. The Soviets still do have more and better, but I didn’t expect a tank-on-tank shootout. On paper, it doesn’t really look this way… the mujahideen don’t have that many vehicles after all… but I think it is exasperated by the way the engine gooses the AI.

I’ve not read any of the details although I’ve speculated on this before. It does seem to me that the AI has an advantage when it comes both to hit and kill percentages. It’s hard to quantify but I feels like my 100mm anti-armor shells bounce harmlessly off of the mujaheddin-operated BMPs while my vehicles of the same model are quickly dispatched by heavy machine guns (the Russian equivalent of the 50 cal., mounted for anti-air use). Skewing the percentages may actually be a very reasonable way to “balance” the game play so the scenarios can be played by either side with both sides being a challenge. It does not help the game along as a “simulation.”
I’m also not sure it makes the game more fun, knowing that the basic laws of physics and probability have been tilted against you.
As I said, the scenario plays out on a giant “board.” The battlefield consists of rough and sloped terrain which means that infantry mostly advances one hex per turn. While I could lead with my vehicles, when I’m worrying about losing a tank to a stray Enfield round, it seems more prudent to hold my armor back as infantry support. In other words, vehicles too advance about one hex per turn. There is a helicopter insertion, which the scenario instructions say is intended to take place to the rear of the enemy position so as to “block the enemy escape routes and attack them from behind.” While I might assume the higher-value victory locations to the rear of the enemy suggest the parameters of the landing zone, I did not believe that they would be undefended. I therefore decided to locate the Spetsnaz company so as to provide mutual support, enhancing my slog up the hill rather than bypassing it.
The long and the short of it was it was a slaughter for my side – both scenarios were. Although I’ll have no problem conceding that either scenario might be winnable given careful planning plus a little trial and error, it is difficult to see how I could have closed the gap from my results. As always, Squad Battles (with its tight time limits) discourages any subtlety in planning. You’ve got to move in a straight line towards your objectives or you’re not going to get there. There were probably better routes up the hill than the ones I took and failing to study the map before a battle probably would end up badly for any such negligent commander. Still, given how far I could get in 18 turns versus how far I need to get, it is difficult to imagine finessing my way over that hump.
A review from when the game was new suggests that one way to tweak a scenario is to edit the time limit and give yourself enough time to play it right. This might make the game more realistically-achievable and allow for more studied use of tactics (leapfrog advance supported by suppressive fire, for example). Maybe that’s the ticket to mastering this domain?
*Actually I have to ask, is this true? There are probably 3 ways to approach such a scenario. (1)Immediately dismount and fully engage every enemy position; (2) try to fight with a portion of your force while pushing onward with the rest; and (3) try to run past the enemy at maximum speed. I almost always, if not always, try some variation of (2). Would (3) work? Can’t know it won’t without trying.

Pingback: Seven Years Bad Luck | et tu, Bluto?